Switch to Live Data
Switch to Live Data
This section details the steps for switching to Live Data and providing necessary permissions to External User Manager.
From Templates tab, click on Switch to Live data button.

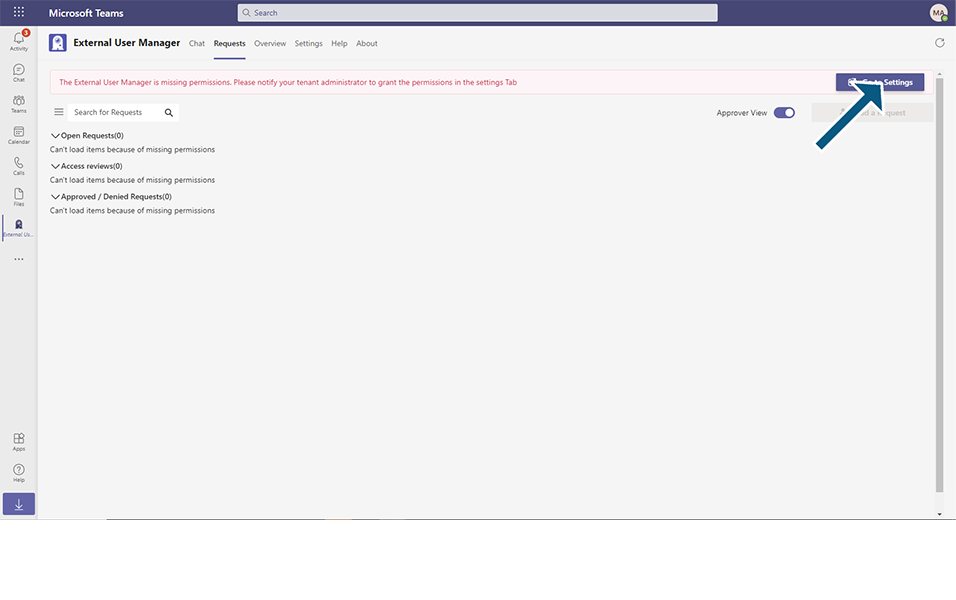
Validation message 'The External User Manager is missing permissions. Please notify your tenant administrator to grant the permissions in the settings Tab' is displayed to the user with Red banner.
Click on Go to Settings in red banner.
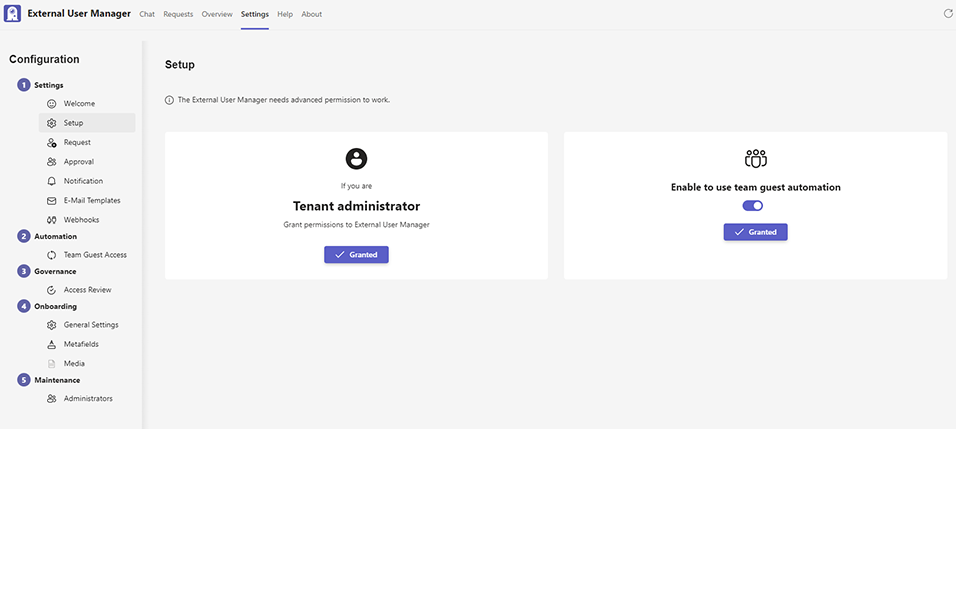
Close the Teaching bubble and Click on Set up menu in left navigation.

Click on 'Grant Permissions to External User Manager' button.

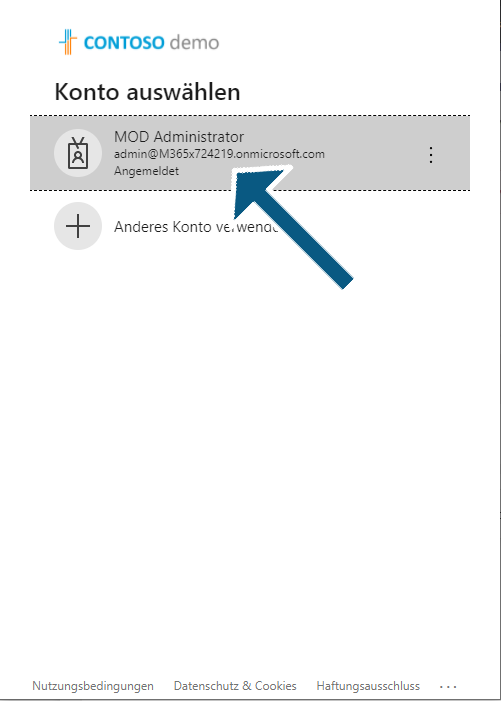
Select the account that the permission needs to be provided.
Click on Accept button in the Permission window.

Confirmation message 'External User Manager has now Application Permissions' is displayed to the user.
Close the window and user can see that 'Grant Permissions to External User Manager' is displayed with green tick mark.

Select the toggle field: Enable to use team guest automation to YES.

Select the checkbox for confirmation in the Required permissions window and click on Accept button.
User can see that 'Grant Consent for your organization' is displayed with green tick mark.
External User Manager application is now ready to be used in Live Data.
This completes the steps to work in Live Data in External User Manager.