Enable Configuration of guest access within Teams
Enable Configuration of guest access within Teams
Teams can be created by enabling guest users to the Teams.
This section describes the steps for creating Teams with Guest Access enabled.
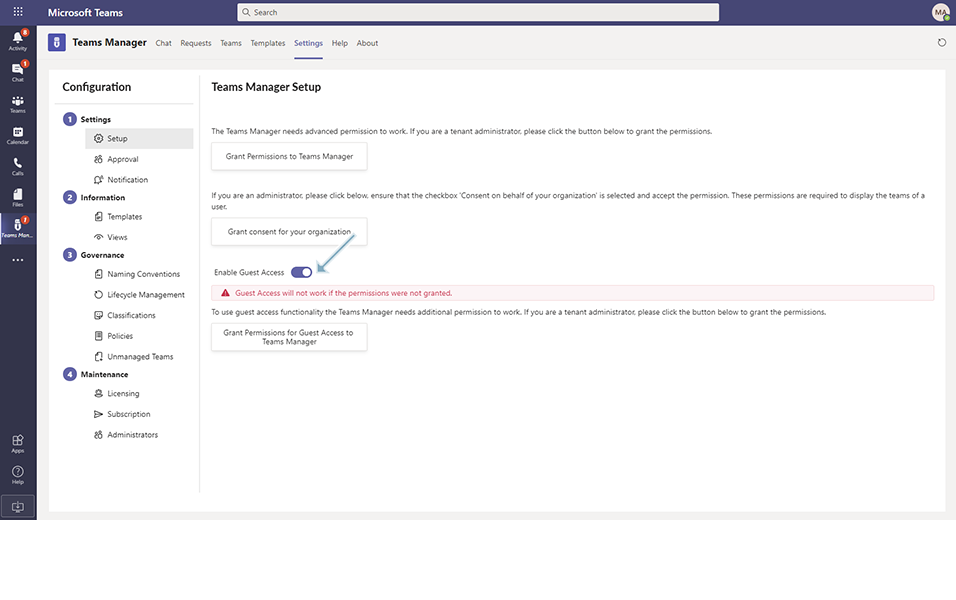
Set the toggle field 'Enable Guest Access' to Yes from Settings ->Setup.
Go to Teams Manager and navigate to tab "Teams".
Click on button "Create a Team".
Select "Public" from "What kind of team will this be?" dialog box.
Select "Template-Guest" from "Which Template do you want to use?" dialog box and click on button "Continue".
NOTE: Template "Template-Guest" is available in Teams Manager.
Enter the details related to the public Teams by entering the Team name as 'Team-Guest' and select Yes in toggle field 'Enable Guest Access'.
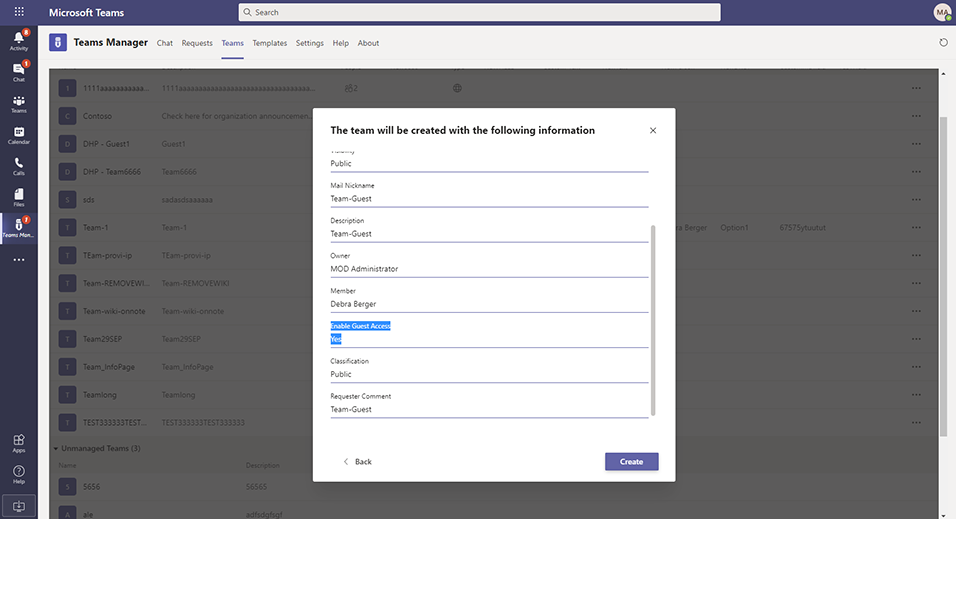
Same will be updated in the Teams Summary page.
Click on button "Create".
Note: Enable Guest Access should be set as Yes in the 'Team will be created with following information' screen.
Displays "Nice work" in dialog box and displays confirmation message "Successfully created request 'Team-Guest'.
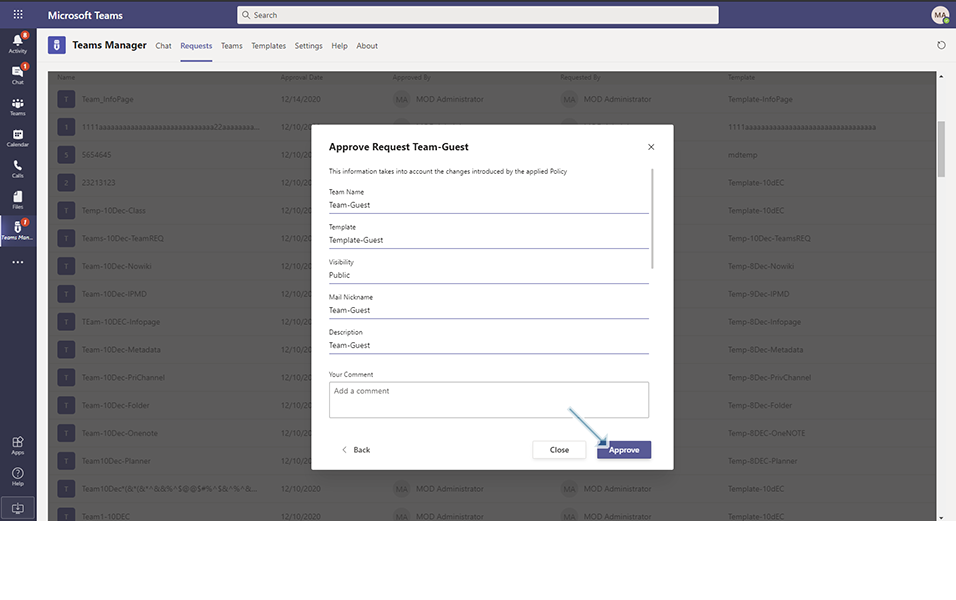
After successful creation of the Team, it displays Team under "My Open Requests" section in "Requests" tab.
Select the Teams 'Team-Guest' and approve the Team.
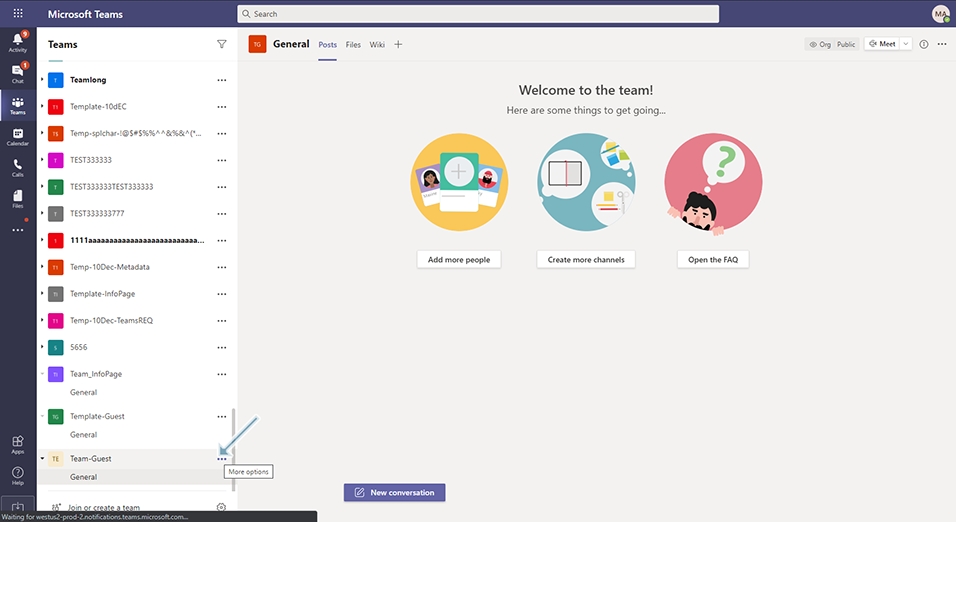
Go to Microsoft Teams and select the team "'Team-Guest".
Right Click on 3 dots and click on Manage Team.
Click on Add Member button.
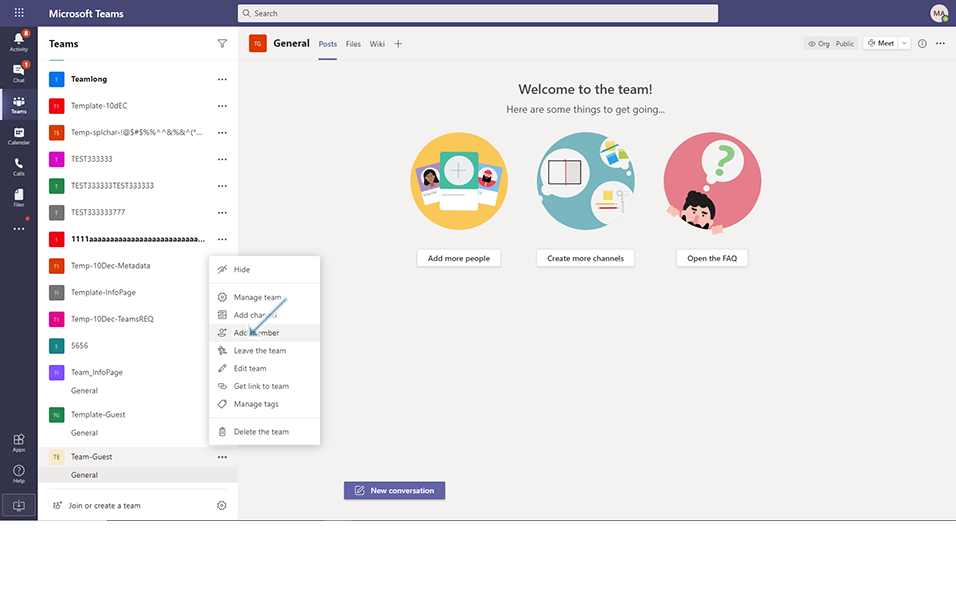
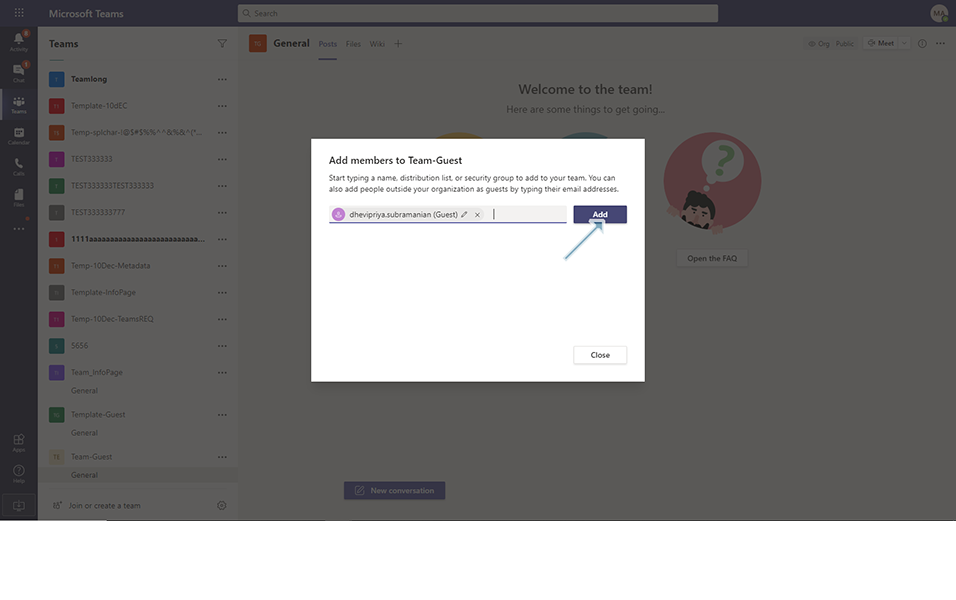
Enter the guest user available in the system or enter the email address of the guest user.
NOTE: Guest user should be available in Admin Center.

Click on button 'Add'.
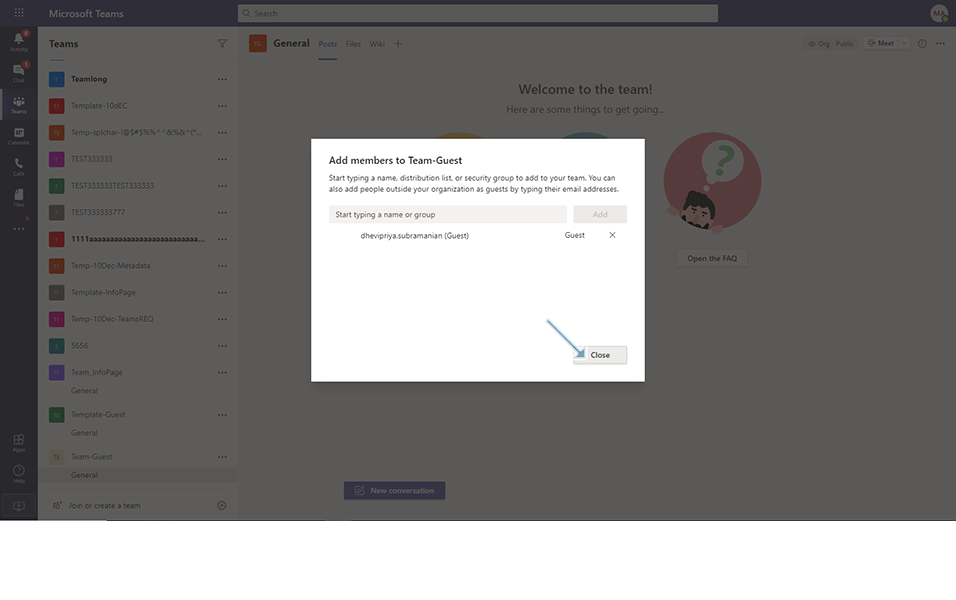
Click on button 'Close'.
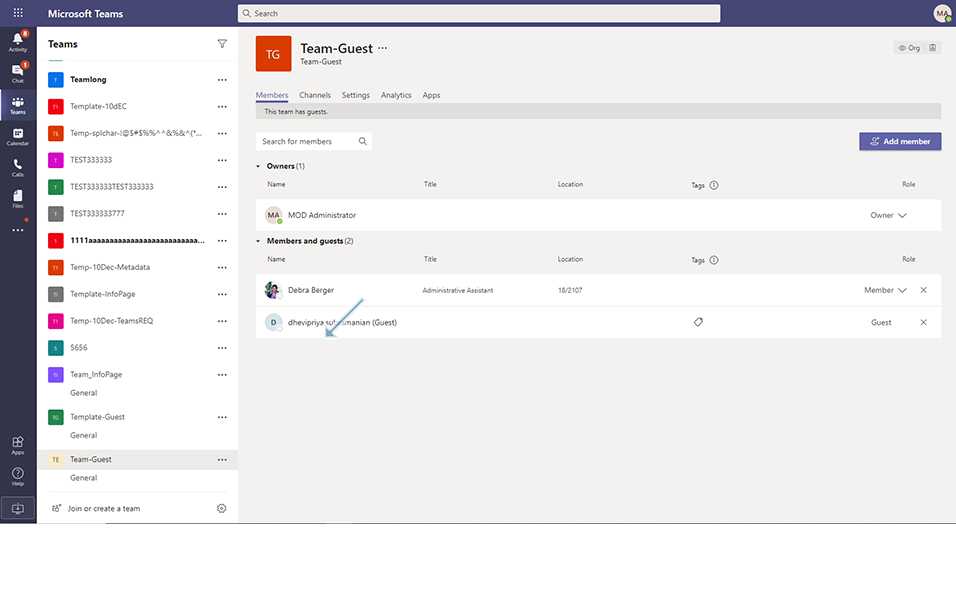
Guest user should be displayed under 'Members and Guests'.
This completes the functionality on creation of Teams in Teams Manager with guest access enabled.