Basic Settings
Basic Settings
This section describes the basic settings to be set for Templates and Workspaces in Collaboration Manager 365.
1. Go to SharePoint Admin Center and click on link "Active Sites". Select the site "CM365" and click on link in "URL" field.
Note: User has to select the Site where CM365 is installed and link in URL field should be clicked on.
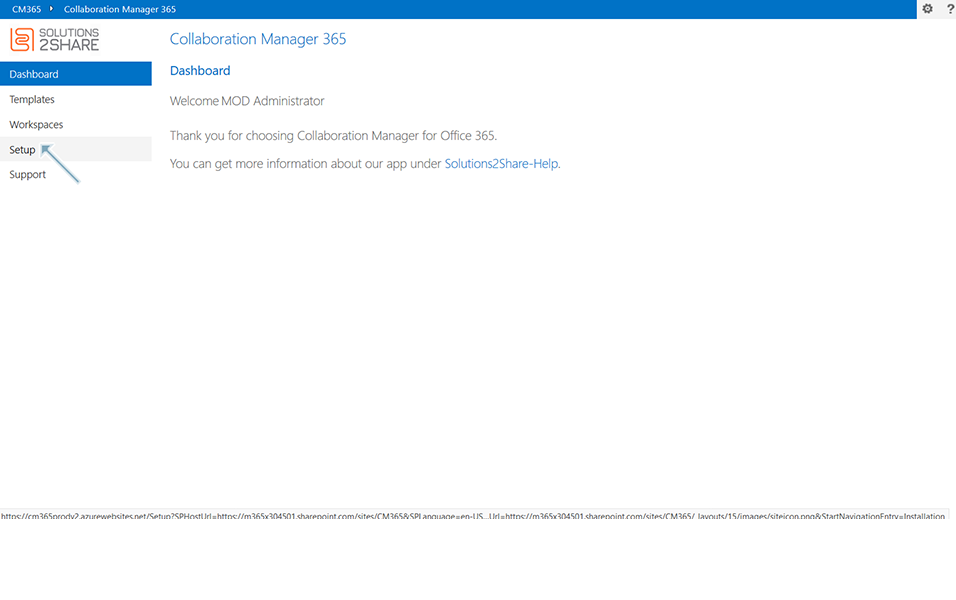
2. Click on link "Site Contents" in left navigation. Click on link "Collaboration Manager 365 V2" in right panel.
3. Collaboration Manager 365 Dashboard is displayed.
4. Click on link "Settings" in left navigation under "Setup".
5. Click on link "Overview" under "Settings". Click on link "Basic Settings" in right panel.
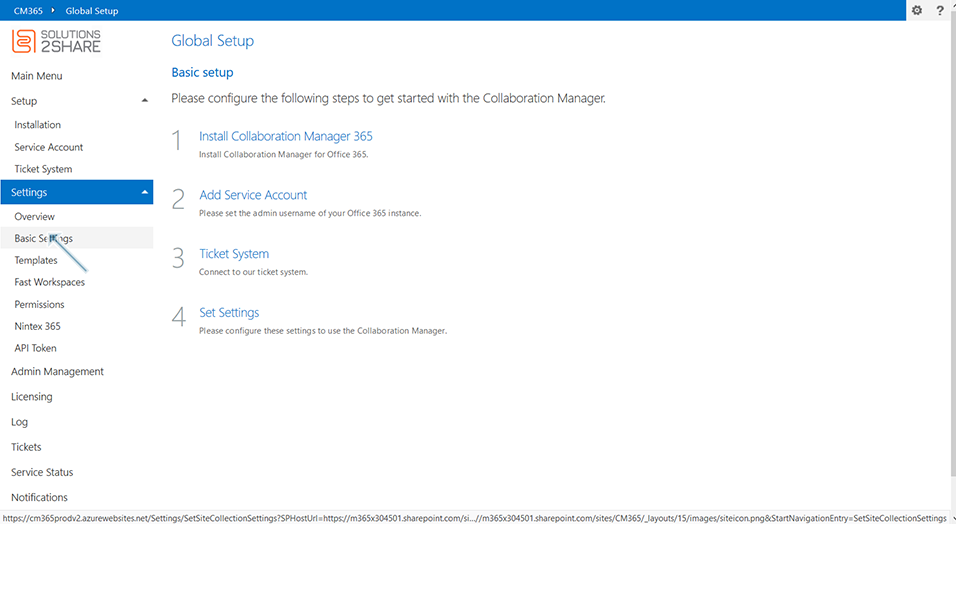
6. Following are the settings and the parameters available for each Settings in templates and workspaces:
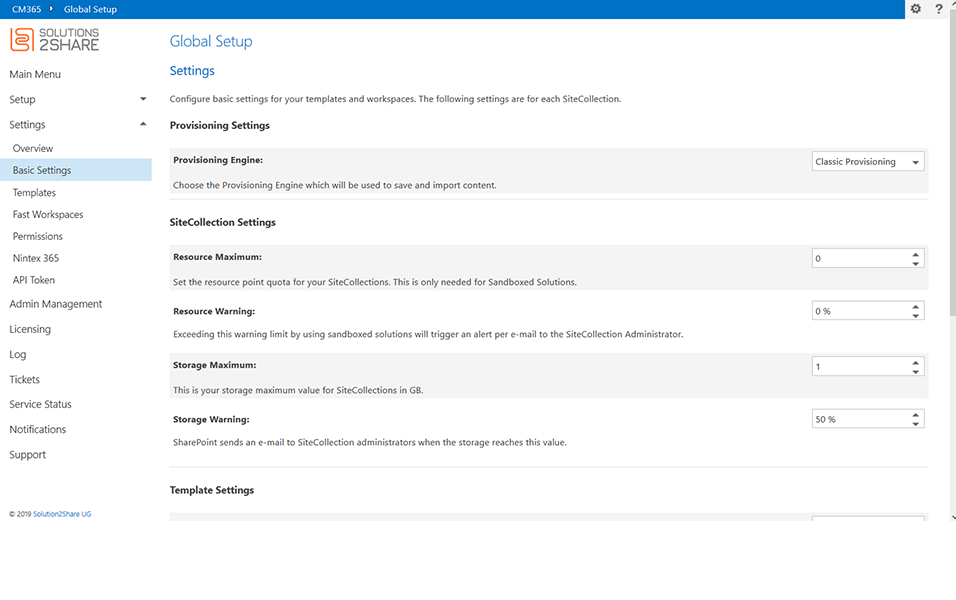
1. Provisioning Settings:
a. Provisioning Engine: Choose the Provisioning Engine which will be used to save and import content.
This is a drop down field which is used to set the provisioning engine which will be used to save and import the content. User can either set the option "Classic Provisioning" or "Modern Provisioning".
Use "Classic Provisioning" by default since TeamSiteCreation will work more stable. The engines used in background for different types of provisioning is different and it is recommended for the users to set the option to Classic provisioning. There is an impact only when template type "Team site(classic) is created.
2. SiteCollection Settings:
a. Resource Maximum: Set the resource point quota for your SiteCollections. This is only needed for Sandboxed Solutions.
User can set the resource to be used by the SiteCollections for the Sandboxed solutions. User can set this value depending on their needs.
b. Resource Warning: Exceeding this warning limit by using sandboxed solutions will trigger an alert per e-mail to the SiteCollection Administrator.
User can set a warning alert to be sent to SiteCollection Administration if the Resource usage exceeds the maximum limit by number of percentage. If Resource Maximum field is set as 40, and if Resource Warning field is set by 10%, when resource usage exceeds the value by 50, warning email is sent to the Site Collection Administrator.
c. Storage Maximum: This is your storage maximum value for SiteCollections in GB.
User can set the storage maximum value for SiteCollection in GB. User can set this value depending on their needs.
d. Storage Warning: SharePoint sends an e-mail to SiteCollection administrators when the storage reaches this value.
User can set a warning mail to be sent to SiteCollection Administrator when the storage exceeds the maximum limit by number of percentage. If Storage Maximum is set to 3GB and Storage warning is set as 50%, when the storage usage is around 1.5GB, SharePoint sends a warning email to the SiteCollection Administrator.
3. Template Settings:
a. Template Language: Select the language for the templates.
This is a drop down field to set the language for the templates. User can either set the option "English" or "German".
b. Managed Path: Create site collections under the selected path. This setting only applies to classic and communication sites.
This is the path where site collections are saved. This can be saved under path of Sites or under Teams. This is applicable only for Classic and Communication Sites. Groups and Teams does not have any impact on this field.
4. Workspace Settings:
a. Workspace URL: The workspace's URL will be composed from the field selected here. E.g.: https://tenant.sharepoint.com/sites/1000 where 1000 results in the value of the ID field. This change is only effective, if no fast workspace exists.
This is a drop down field to set the value in workspace URL. Following options are available in this field:
a.1 Title: User can select this option "Title" from drop down. When user creates a workspace of type "Item" with "Title" field updated as "NewWS", when user clicks on URL link in list view, it displays as
https://(example).sharepoint.com/sites/CM365/NewWS/default.aspx
Note:
This setting is applicable only to workspaces of type "Item" and type "Communication Site".
This setting is applicable only if there are no fast workspaces available.
a.2 Status: User can select this option "Status" from drop down. When user creates a workspace of type "Item" and the status is completed, when user clicks on URL link in list view, it displays as
https://(example).sharepoint.com/sites/CM365/completed/default.aspx
Note:
This setting is applicable only if there are no fast workspaces available.
a.3 Mail Nickname: User can select this option "Mail Nickname" from drop down. When user creates a workspace of type "O365 Group" with "Nickname" field updated as "GroupTest", when user clicks on URL link in list view, it displays as
https://(username).sharepoint.com/sites/CM365/GroupTest/default.aspx
Note:
This setting is applicable only to workspaces of type "O365 Group" and for type "Teams".
This setting is applicable only if there are no fast workspaces available.
a.4 ID: User can select this option "ID" from drop down. When user creates a workspace of any type and when user clicks on URL link in list view, it displays as:
https://(example).sharepoint.com/sites/CM365/111/default.aspx
This ID keeps incrementing on creation of every workspace item.
b. Workspace URL Display: This is the text that is displayed for the user on the Workspace page at URL.
The value that is displayed in URL column depends on the settings provided in Workspace URL Display field. This is the drop down field with following values.
b.1 Title: User can select this option "Title" from drop down. When user creates a workspace of type "Item", with title as "Item001", URL value under workspace list view will be displayed as "Item001" as a hyperlink.
b.2 URL: User can select this option "URL" from drop down. When user creates a workspace of type "Item", URL value under workspace list view will be displayed as
https://(example).sharepoint.com/sites/(Template name+List Item ID)
b.3 Status: User can select this option "Status" from drop down. When user creates a workspace of type "Item", URL value under workspace list view will still be displayed with hyperlink of URL as
https://(example).sharepoint.com/sites/(Template name+List Item ID)
b.4 Mail Nickname: User can select this option "Mail Nickname" from drop down. When user creates a workspace of type "Item", URL value under workspace list view will still be displayed with hyperlink of URL as
https://(example).sharepoint.com/sites/(Template name+List Item ID)
b.5 ID: User can select this option "ID" from drop down. When user creates a workspace of type "Item", URL value under workspace list view will be displayed as "list Item ID" as a hyperlink. (eg) Hyperlink will be displayed as "277" under URL column where "277" is the List Item ID.
Buttons:
Following buttons are available in the Setting page and the functionalities listed below:
Save : Saves the settings mentioned in this page.
Reset without saving: All the default settings are retained without saving user made changes.
Back to Settings