After the installation of the Template Hub you can navigate into the app by clicking the „Template Hub“ link in your hostweb.
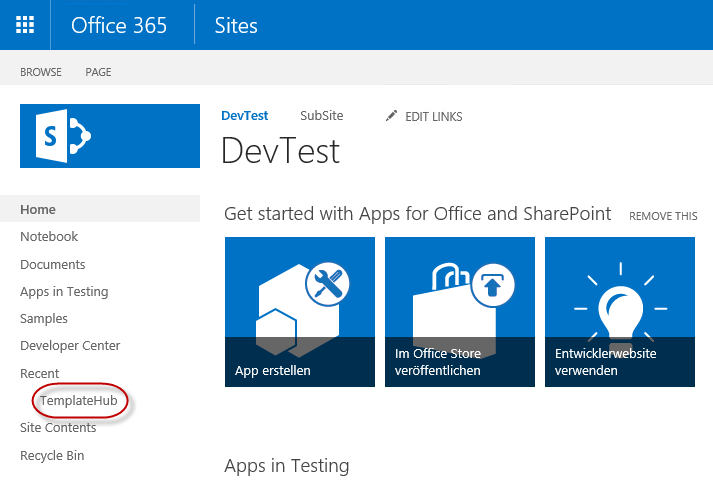
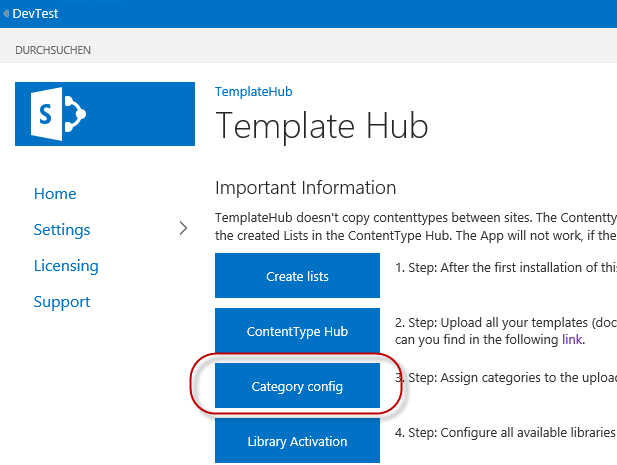
You will get into the following entry page where you should follow the written steps.
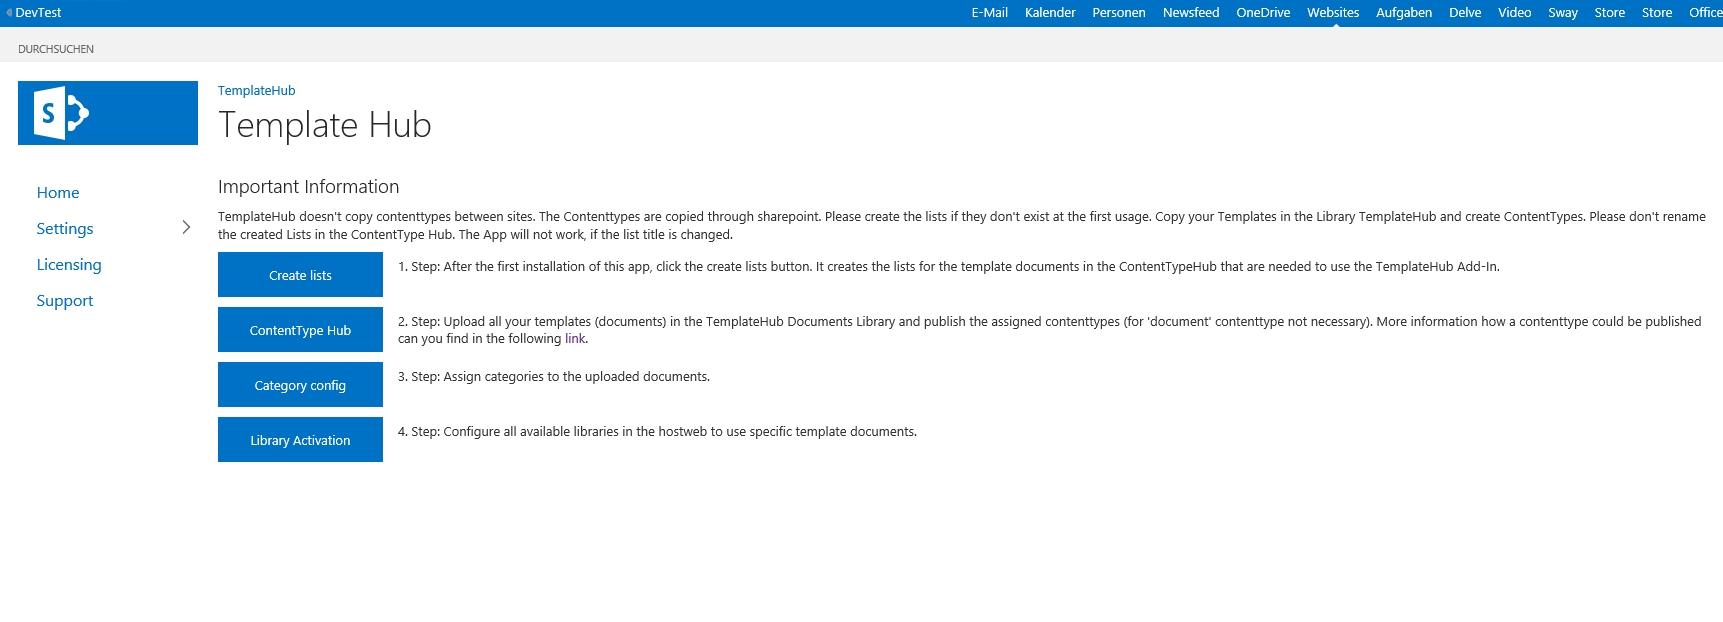
Click on the “Create lists” Button to create the required lists in the ContentTypeHub Site Collection. This sitecollection exists on every SharePoint Online Tenant and can be accessed through the URL https://tenantname.sharepoint.com/sites/contenttypehub. After clicking the button you will see a success information on the right of the button. You should only click this button once for the entire tenant. If you install the app in another SiteCollection or Site, than you don’t have to click this button again.
In the next step you can navigate to the contenttype hub with the click on the button “ContentType Hub”. Please create alle your contenttypes on this SiteCollection. If you are ready you have to publish this contenttype.
In the Manage ContentType form you have the button “Manage Publishing of this ContentType”.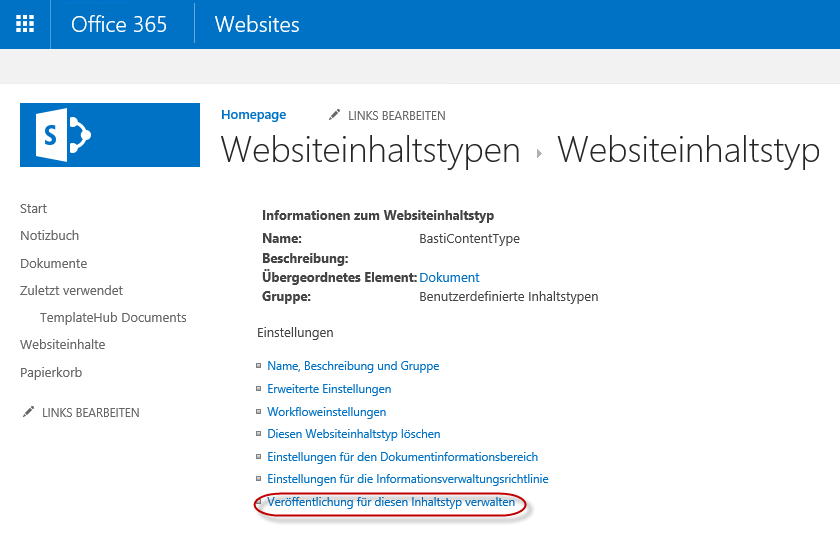
Please click on Publish and OK to publish this contenttype to all SiteCollections:
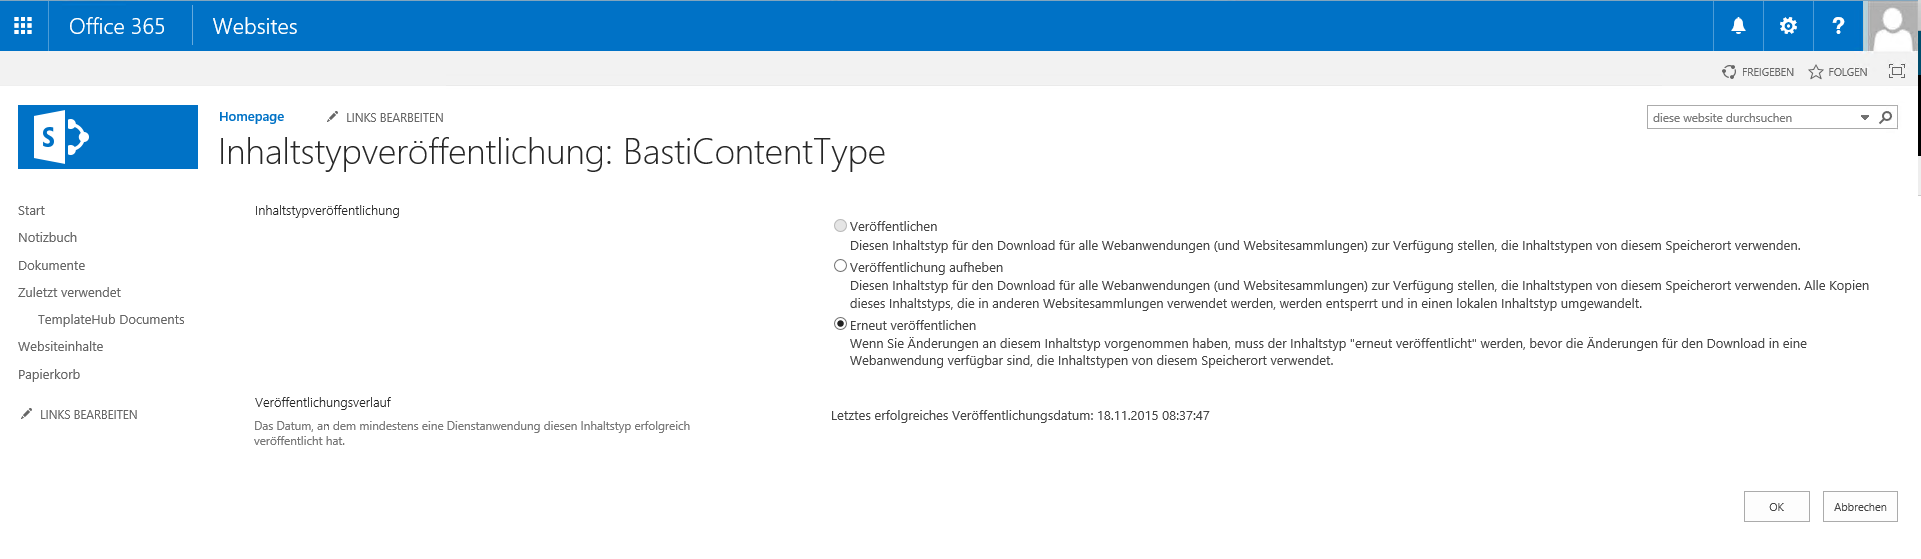
This operation takes a while. A timerjob which runs every hour needs to start in SharePoint in order to publish your contenttypes. So be patient and wait up to 1 hour to get your contenttype published.
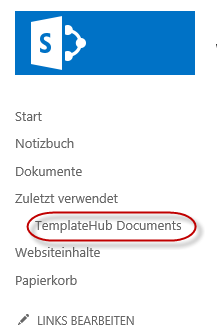
Now you can navigate to the “TemplateHub Documents” Library in the navigation bar.
Here you can upload all your template documents that should be available for your users.
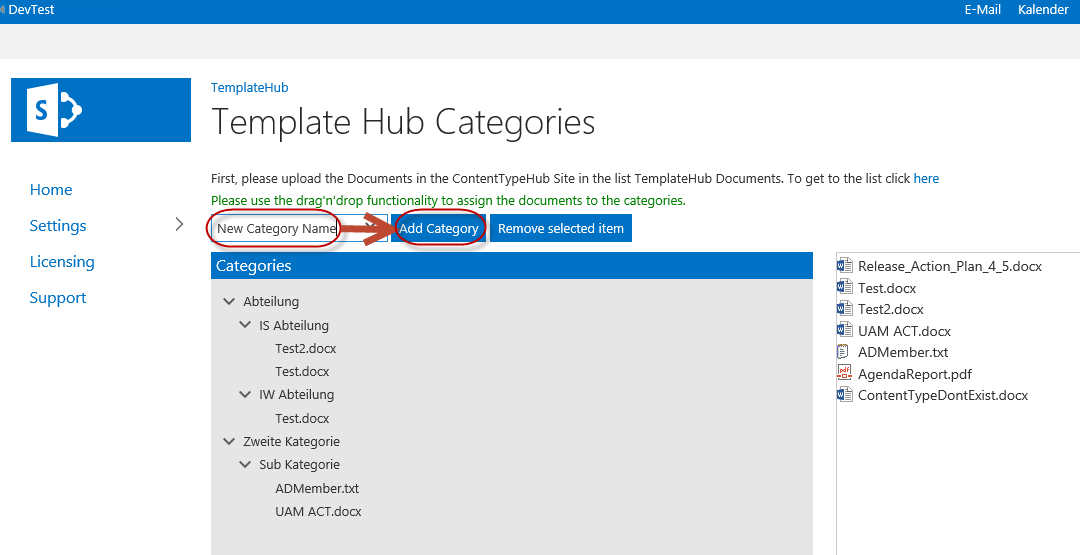
Navigate back to the TemplateHub App and click on the Button “Category config”.
In this settingspage you can drag’n’drop the documents on the right to the Categories on the left. If you want to create a new Category, type in the name of the new Category in the Textbox and click Add Category:
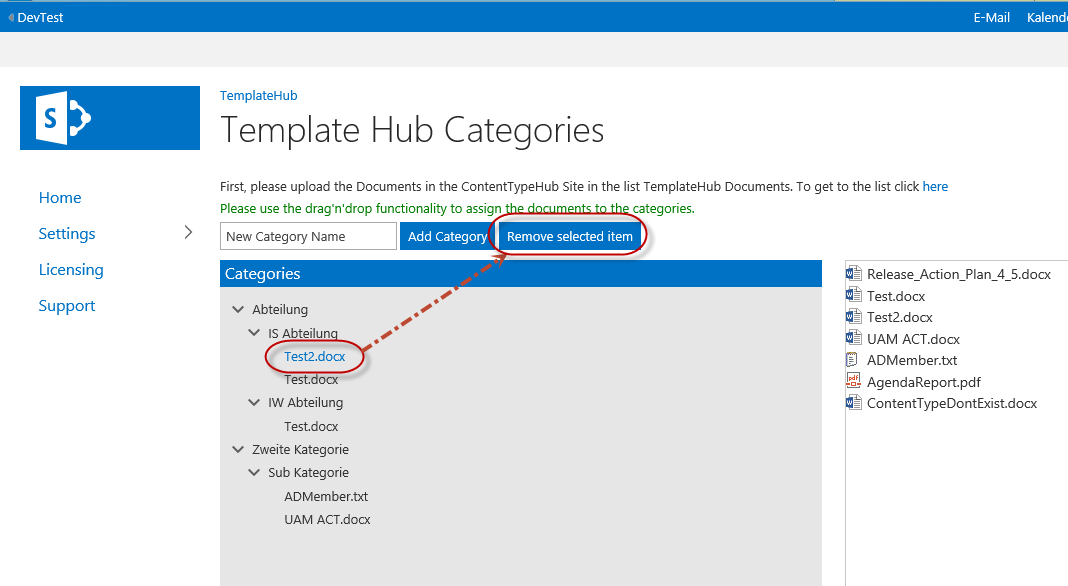
If you want to remove a category or an added document you can click on it and click the “Remove selected item” button. Make sure an element on the left is selected and colored blue.
When you drag’n’drop an element you will see it in a white box while dragging:
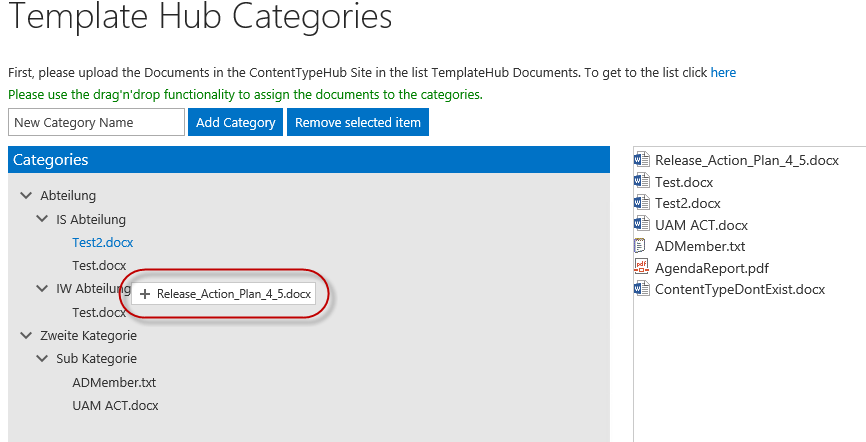
You can only have 2 levels of Categories and a document cannot be a subelement of a document.
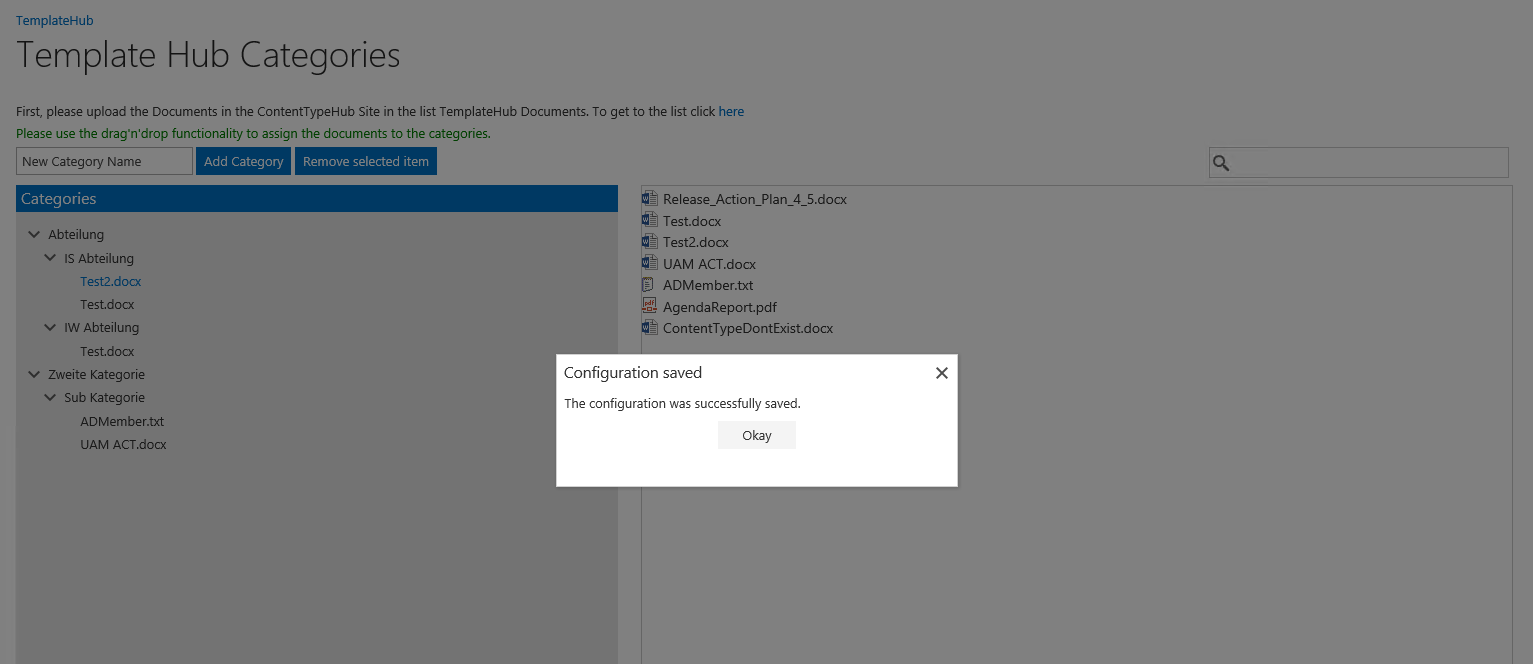
Click on the “Save” Button when you finished your configuration and you will see a Success dialog:
The last step is the configuration of the activation in the document libraries, where the TemplateHub should be used with.
You see a similar dialog to the last Category Settings Screen. Please drag’n’drop the documents from the right to the left side and assign them to the document libraries.
If you are finished you can save the configuration with the “Save” Button.

You are now ready to go. If you want to use it, go to the library where you have assigned any documents templates and click on the “New from Template” Button. 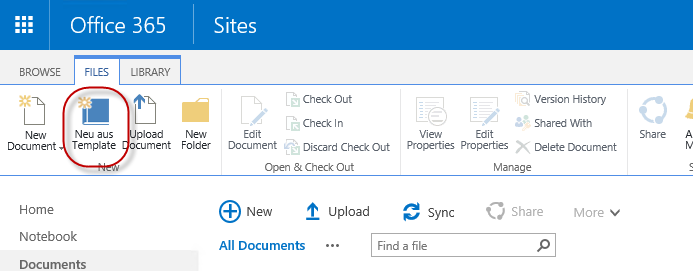
If you can see the following Form with your documents and Categories then you are good to go.
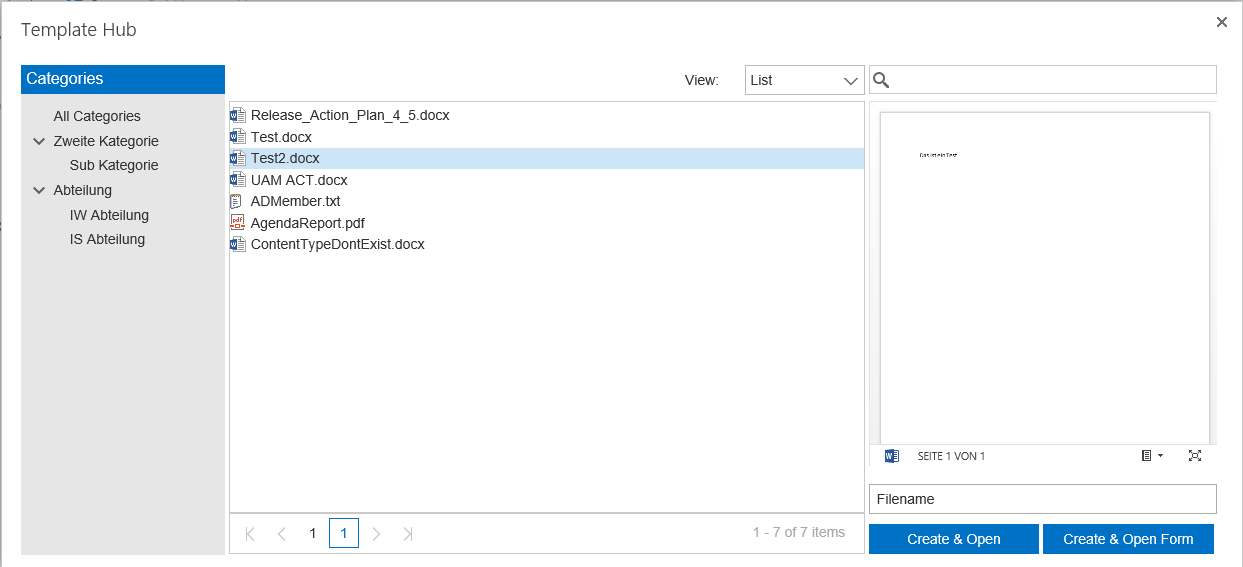
Choose a template document and click the Create & Open Button to open it directly in the Word Online Editor. To get directly to the Editform you can click the Create & Open Form Button.